kbh03.gif

Piano Technique 4
SCALES 1

  1. The Art of Walking Sideways
  2. Major scale Fingerings
  3. Beginning Keyboard students
  4. Scale Practice
  5. Scale Practice Sequence
  6. The "Birds Claw" Exercise
  7. Practice Material

    Subject Index - Topic Index

    PIANO LAB - Intro - Songs

Lessons | 1 | 2 | 3 | 4 | 5 | 6 | 7 | 8 | 9 | 10 | ?? |


(
Down - Top)

KT 4.1 - The Art of Walking Sideways

I always think that the actions we use in walking are very similar to the correct actions in keyboard finger technique.

Walking is (after our heart beat and breathing) the most relaxed, natural and even paced body movement we do.

Let us compare the main features.

  1. walking action - main flexion point is the hip joint
    finger technique - main flexion point is the knuckle joint

  2. walking action - upper body is relaxed and supported by the legs
    finger technique - hand and arm are relaxed and supported by the fingers

  3. walking action - lift feet clear of the ground to avoid stumbling
    finger technique - lift fingers clear of the keyboard to avoid stumbling

  4. walking action - use gravity and momentum from body weight and legs for main motion energy.
    finger technique - use gravity and weight of fingers, hand and arm for main motion energy

  5. walking action - evenly, usually at a steady pace
    finger technique - evenly, usually at a steady tempo

  6. walking action - feel the ground under your feet
    finger technique - feel the bed of the keyboard

The only difference is that the motion in walking is forward (when sober), while in keyboard finger technique the motion is sideways. Having five fingers and only two legs this distinction is quite sensible.

When practising it may help to keep the notion of walking on the keyboard (with your fingers) in your mind.

Practice of scales is an important element in developing a good finger technique.
When practised correctly it helps develop interossei muscle strength, evenness and fluency in all keys.

Always make sure you maintain a good hand position :

  1. wrist up

  2. thumb (and little finger) pointing downwards to the keys

  3. lift fingers high off the keyboard after each note has been played

  4. maintain a light forward pressure (towards the piano). Do not pull backwards !
kbt0401.gif

If you not yet print out the Hand Position Diagram, do it now, and hang it on the front of your piano as a constant reminder. (It also includes a Diagram of the Circle of 5ths.)


(Down - Up - Top)

KT 4.2 - Major scale Fingerings

Good fingerings are an integral part of a fluent keyboard technique.

To develop good fingerings it is important to learn the established finger patterns for scales and arpeggios.
Eventually this will become an almost subconscious part of your keyboard skills.

Fingerings for the major scales and all other 7-note scales and modes consist of alternating patterns using fingers

1 2 3 - and - 1 2 3 4
(thumb = 1, little finger = 5)

The standard fingering patterns as used for the C major scale are :

kbt0402.gif

Exactly the same patterns are used for the major scales in G, D, A and E.

Observe that :

  1. a complete finger pattern covers covers one octave (7 notes) and is repeated over following octaves. This is an important feature of all good finger patterns.

  2. the thumb is played on all tonic notes of the scale except at turning points where the little finger (5) is conveniently used.

  3. the 4th finger is used in each hand on a note next to the tonic note.
    • For the C scale this is the note B for the right hand and D for the left hand.

    • For the G major scale this is the note F# for the right hand and A for the left hand.

    • similar for the major scales in D, A and E.

Finger patterns for other scales.

Make sure to follow the scale fingering patterns outlined in this Course (and in the Scales Book for 20 popular Jazz scales).
Gradually this will result in a fluent, subconscious and effortless fingering technique.


(Down - Up - Top)

KT 4.3 - Beginning Keyboard students

kb002.gif If you just have started learning to play the piano, or never have practised scales before, I recommend the following practice procedure.
  1. Start playing the scale over two octaves, one hand at the time in the keys of C, G, D, A and E. (This is quite easy.)

  2. Extend your major scale practice to the remaining seven major scales.

  3. Now start playing the scales over two octaves, but with both hands together.
    This is not so easy at first, as it requires independent coordination for each hand.

  4. Only when mastering the above you should start with the accented scale exercises explained below.


(
Down - Up - Top)

KT 4.4 - Scale Practice

Practise all scales slowly and evenly with an accent on each beat.

Play each note firmly down to the bed of the keyboard and raise the finger high above the key immediately on striking the next note.

Practise the scales for each hand separately until you have mastered the correct fingerings and placing the accents. Then play all scales with both hands, the left hand one octave below the right.

Practise each scale :
  1. in 2 octaves, accenting each group of 2 notes

  2. in 3 octaves, accenting each group of 3 notes

  3. in 4 octaves, accenting each group of 4 notes

As the fingering for the scale remains the same, the accents fall in each case on different fingers.

It is important that the tempo of the basic beats through these exercises remains constant, so that the scales accented from 2's to 3's to 4's increase in speed. (In other words, the tempo of the beats remains the same, but the number of notes between each two beats increases.)

kbt0404.gif

Here an example of the C major scale played in quavers (eighth notes) over 2 octaves.

Audio 4.1
kbt0403.gif

All red notes are firmly accented, but the notes in between are also played fully down to the bed of the keyboard.

Now listen carefully to Audio 4.2.
The metronome stays constant (at MM = 50) throughout the exercise, but the number of notes played from one beat to the next increases from 2 first to 3 and then to 4.

Once fluency is established, increase the speed of the scales by playing a complete octave (7 notes) in the same beat tempo that you set for the groups of two, three and four.
Play each scale over four octaves, and accent each tonic note.
Audio 4.3
kbt0405.gif

Once you can do all above exercises effortlessly, take out all accents and play the scales evenly, but keep thinking the down beats in your mind. (Always start each practice session with playing a few scales in accented twos, threes, fours and octaves first.)

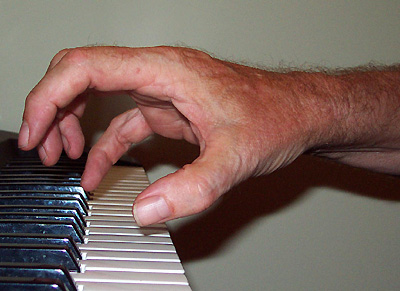
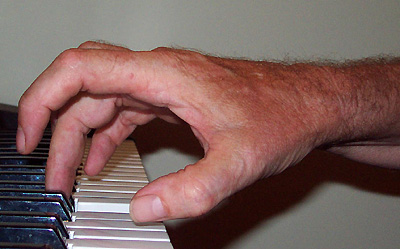
While playing scales always be conscious of the finger movement and realise that this is more a physical experience rather than a musical one.
Play each note firmly into the bed of the keyboard and raise the finger clear of the key immediately on striking the next note.
Apply this method to all scales.

In time good finger fluency will develop.


(
Down - Up - Top)

KT 4.5 - Scale Practice Sequence

Initially practise the scales in Circle of Fifths order, progressing in clockwise direction.

  1. First play the C major scale accented in twos, then threes, then fours.

  2. Then play the G major scale accented in twos, then threes, then fours.

  3. Then the D major scale in the same way.

Cover 4 to 6 different major scales each day in this fashion, so that you cover all twelve keys in two or three days.

Once you know all major scales well, play all twelve scales each day, but only once.

kbcof.gif

For example : Audio 4.4 starts with the C scale accented in twos, then the G scale accented in threes, followed by the D scale accented in fours. Then the A scale accented in twos again, followed by the E scale in threes, and so on.

Next day you start with the F major scale accented in twos, the C scale in threes, the G scale in fours, and so on.
This way all twelve scales get played accented differently every three practice days.

For variety you can also follow the Circle of Fifths in anti-clockwise direction.
For example : C - F - Bb - Eb - Ab - etc.

Or you can select the scales in chromatic order, up or down a semitone each time.
For example : C - Db - D - Eb - E - etc.


(Down - Up - Top)

KT 4.6 - The "Birds Claw" Exercise

This exercises is pure agony if you do it correctly and therefore not for the faint hearted.

For the very first three weeks only (!!) when you start scale practice as outlined in this lesson :

  1. Hold all fingers of each hand like a birds claw.

  2. put (with your flexor muscles) maximum tension on all fingers, as if you want to dig a hole in the ground with them (with a very firm grip).

  3. Keep this tension on all fingers while slowly playing a major scale over two octaves accented in twos.

  4. Keep doing this for 10 - 15 minutes of scale practice no more !
kbt0408.jpg

This is a hell of an exercise and wears you out both physically and mentally (I remember it well when I went through it at the time).

kb001.gif The Birds Claw exercise goes against all the rules of good piano technique, so why would you do it ?

By fully engaging the flexor muscles through the firm finger grip, the interossei muscles are forced to become involved in the finger movements for the scale exercise.

After about three weeks of this agonising procedure you can stop as the interossei by then are getting the message : "move those fingers guys, or else !

Be careful not to overdo this exercise, give it a go for three weeks, not more otherwise you may do some muscle damage to your hands (if in doubt Ask me !).


(Down - Up - Top)

KT 4.7 - Practice Material

Metronome
Major scale Text Demo p.1 p.2
Hand Position DiagramTextp.1


(Up - Top - ? ?)

© 1999 Michael Furstner (Jazclass)